How to edit and annotate a screenshot on Mac
Turn a raw capture into clear visual feedback with arrows, text, numbered steps, highlights, privacy tools, and focused crops.
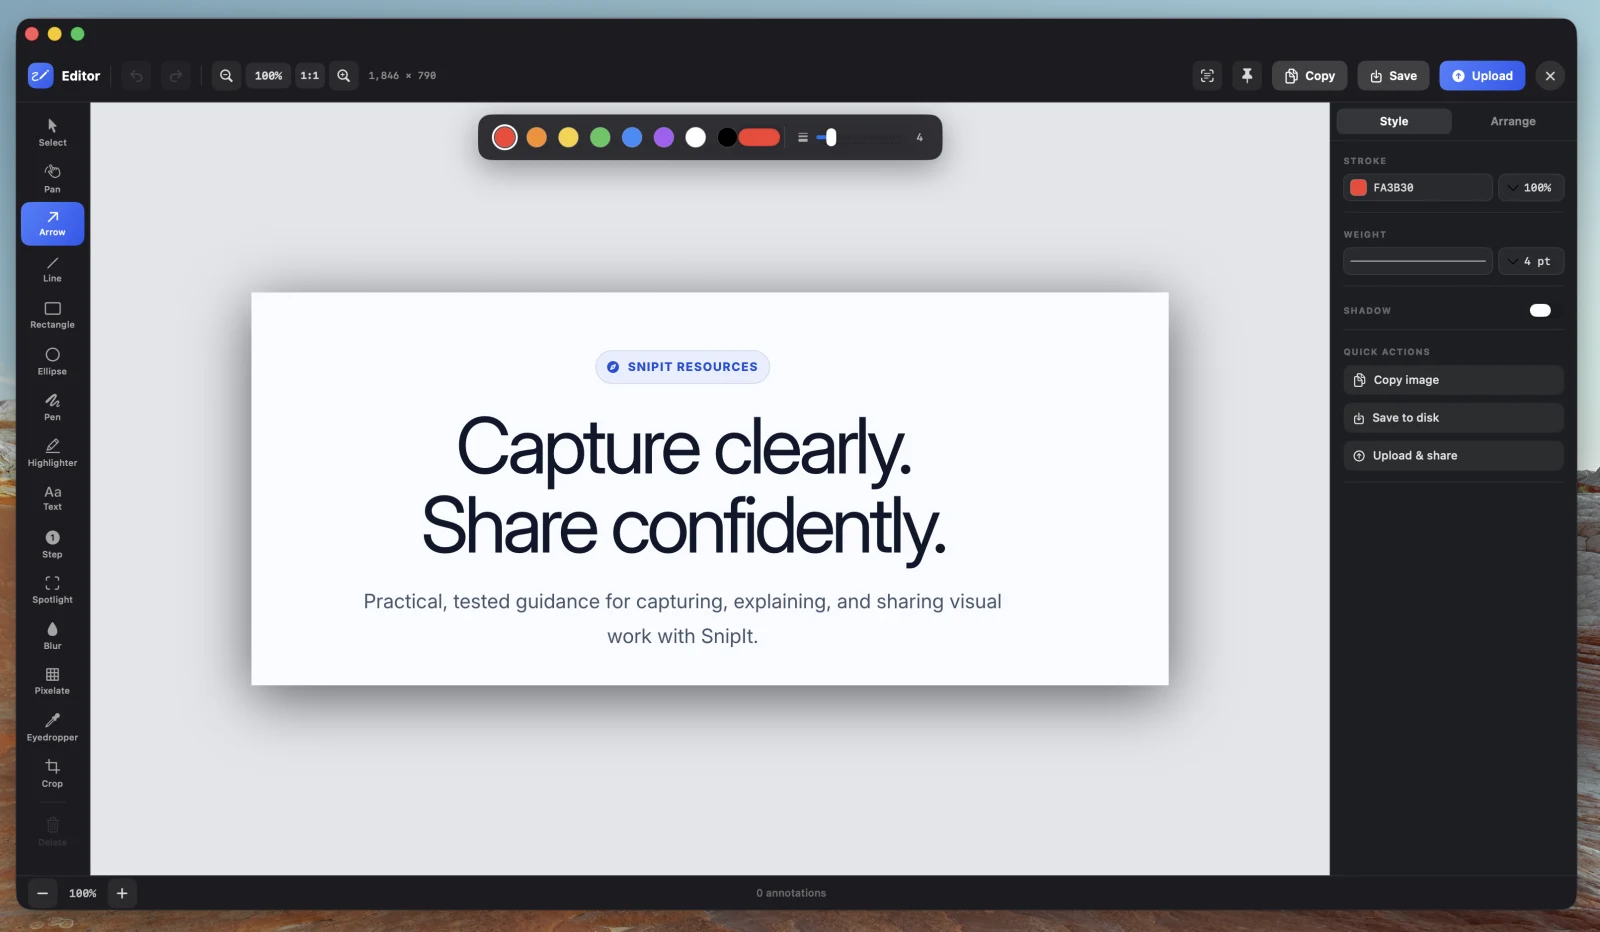
A useful annotation directs attention without making the screenshot harder to read. SnipIt keeps drawing tools on the left, contextual styling above the canvas, and copy, save, and upload actions in the top bar.
Open the editor
Choose Annotate in Quick Access immediately after taking a snip. For an older capture, open Capture Vault, select the item, and choose Annotate. You can also choose Paste Snip from the menu bar to edit an image already on your clipboard.
Choose the right tool
Hover a tool to see its one-letter shortcut. Examples include A for Arrow, T for Text, S for Step, B for Blur, X for Pixelate, and C for Crop.
Build a clear annotation
Start with one message
Decide what the viewer should notice or do. Crop first if unrelated content makes that answer less obvious.
Add the smallest useful annotation
Use an arrow for one target, a rectangle for a region, or Steps for a sequence. Keep text short enough to scan without hiding the interface below it.
Adjust its style
Select an annotation to change its color, stroke, size, or text styling in the contextual toolbar. Use consistent colors when several annotations belong together.
Review privacy and readability
Zoom in and check every name, email address, token, notification, and browser tab. Confirm that privacy effects fully cover the original detail in the exported image.
Copy, save, or upload
Copy for immediate pasting, Save for a local file, or Upload for a shareable link. Export only after reviewing the final canvas.
Three habits that improve every screenshot
- Use contrast deliberately. Pick an annotation color that remains visible on the captured background.
- Prefer one visual hierarchy. A single strong arrow is clearer than several competing marks.
- Number procedures. Step markers make support replies and QA reproduction paths easier to follow.
Troubleshooting
An annotation moved when you meant to edit it
Choose Select, click the object once, and use its controls. For text, click to select and double-click when you intentionally want to edit its content.
The image is larger than the window
Use Fit to see the whole canvas, 1:1 for pixel-accurate review, or Pan to move around without changing annotations.
You changed the wrong item
Use Undo in the top bar. SnipIt keeps changes editable until you export or close the editor.
Need to capture a page longer than the screen?
Scroll Snip combines a long webpage or panel into one continuous image before you annotate it.